
Server Decommissioning: 12 Must-Know Steps for a Stress-Free Process
Follow this server decommissioning guide with 12 essential steps covering data destruction, asset tagging, and verification before pickup.
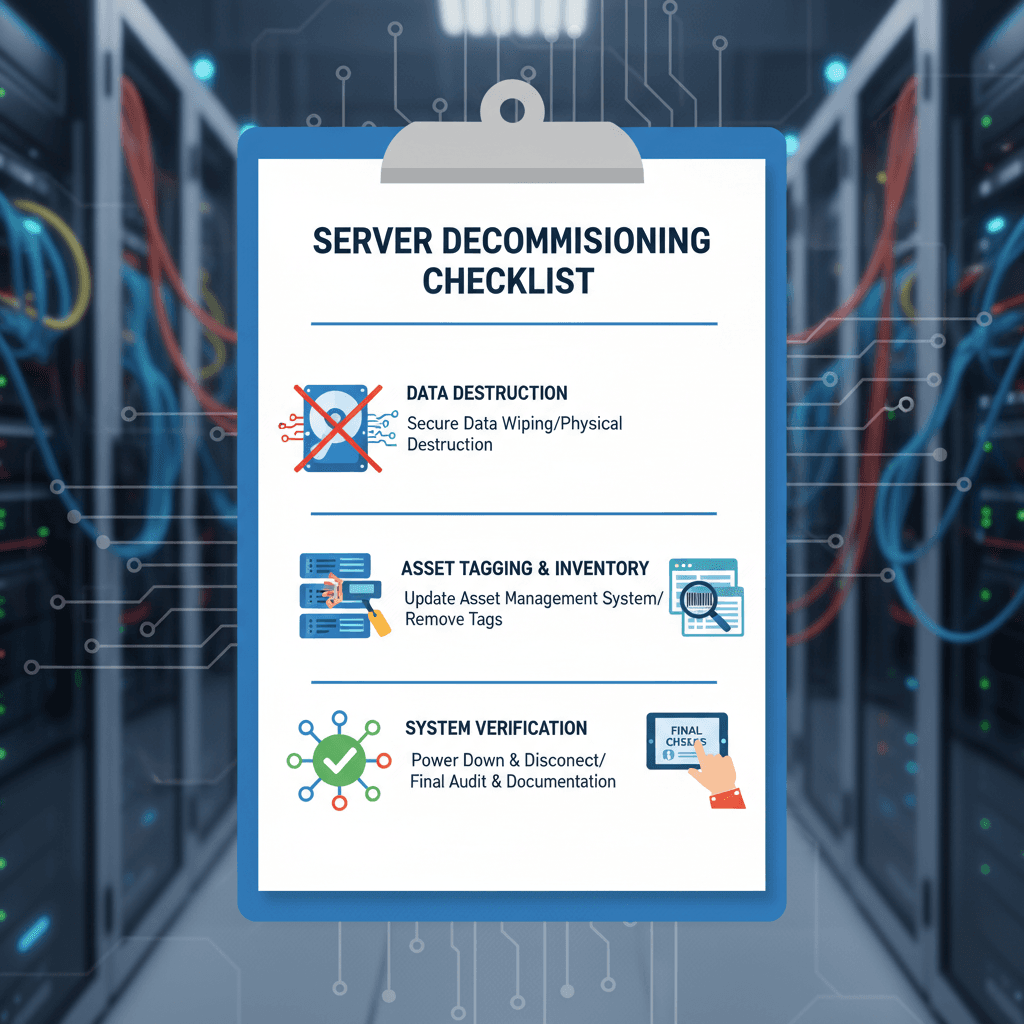
Introduction
Key Takeaways
- Server decommissioning requires a structured, step-by-step approach to prevent data breaches and ensure compliance
- A comprehensive checklist covering data destruction, asset tracking, and chain-of-custody documentation is essential for secure infrastructure retirement
- Proper planning and execution protect your organization from security risks, regulatory violations, and financial waste
- Post-pickup verification provides critical confirmation that all decommissioning steps were completed successfully
- Following industry best practices ensures maximum asset value recovery while meeting environmental regulations
I remember the first time I was tasked with overseeing a server decommissioning project. The importance of having a thorough checklist cannot be overstated—I learned this the hard way when we almost overlooked a critical step that could have exposed us to data breaches. One experience stands out: I was in charge of ensuring all data was destroyed properly before the truck arrived for pickup, and we nearly missed a single hard drive that had been buried in the back of a server.
Server decommissioning is the controlled shutdown and removal of all IT infrastructure from a facility, including servers, storage arrays, and network equipment. This process involves systematically retiring IT assets while maintaining data security, maximizing asset value, and meeting environmental regulations. Without a structured approach, organizations risk exposing sensitive data, losing track of valuable assets, and facing compliance violations.
Why a Comprehensive Checklist Matters
Large-scale infrastructure retirement requires structure, coordination, and evidence. A governed program that tracks every asset and documents every handoff is not just a best practice—it's a necessity. Going through every item on a decommissioning checklist, from asset tagging to chain-of-custody handoff, was essential to making sure nothing fell through the cracks in my own experience.
The stakes are high. A single missed hard drive can contain years of customer data, financial records, or proprietary information. Unclaimed software licenses can drain budgets unnecessarily. Network configurations left in place can create security vulnerabilities long after physical hardware is removed. This guide walks you through twelve essential steps to ensure your decommissioning process is thorough, secure, and stress-free.
Whether you're retiring a single server or shutting down an entire data center, following a systematic approach protects your organization from risk while recovering maximum value from your retired assets. The following steps will help you navigate the complexities of secure infrastructure retirement with confidence.
Sources
Follow this decommission server checklist to ensure proper data destruction, asset tagging, and verification before the truck arrives for pickup.
Focus keyword: server decommissioningTone: professional
Table of Contents
- Introduction — Highlight the importance of a thorough decommission server checklist and share a personal experience related to the topic.
- Table of Contents
- Step 1: Data Destruction — Discuss the importance of following guidelines for data destruction to prevent data breaches.
- Step 2: Asset Tagging — Explain how proper asset tagging helps in tracking and managing decommissioned servers.
- Step 3: Chain of Custody — Describe the process of maintaining a chain of custody during decommissioning.
- Step 4: Network Cleanup — Discuss the significance of clearing network configurations and preventing lingering data.
- Step 5: License Reclamation — Highlight the benefits of reclaiming unused licenses during the decommissioning process.
- Step 6: Post-Pickup Verification — Explain the importance of verifying that all steps were completed successfully after server pickup.
- Conclusion — Summarize the essential steps of the decommission server checklist and reinforce their importance.
9 sections
Step 1: Data Destruction
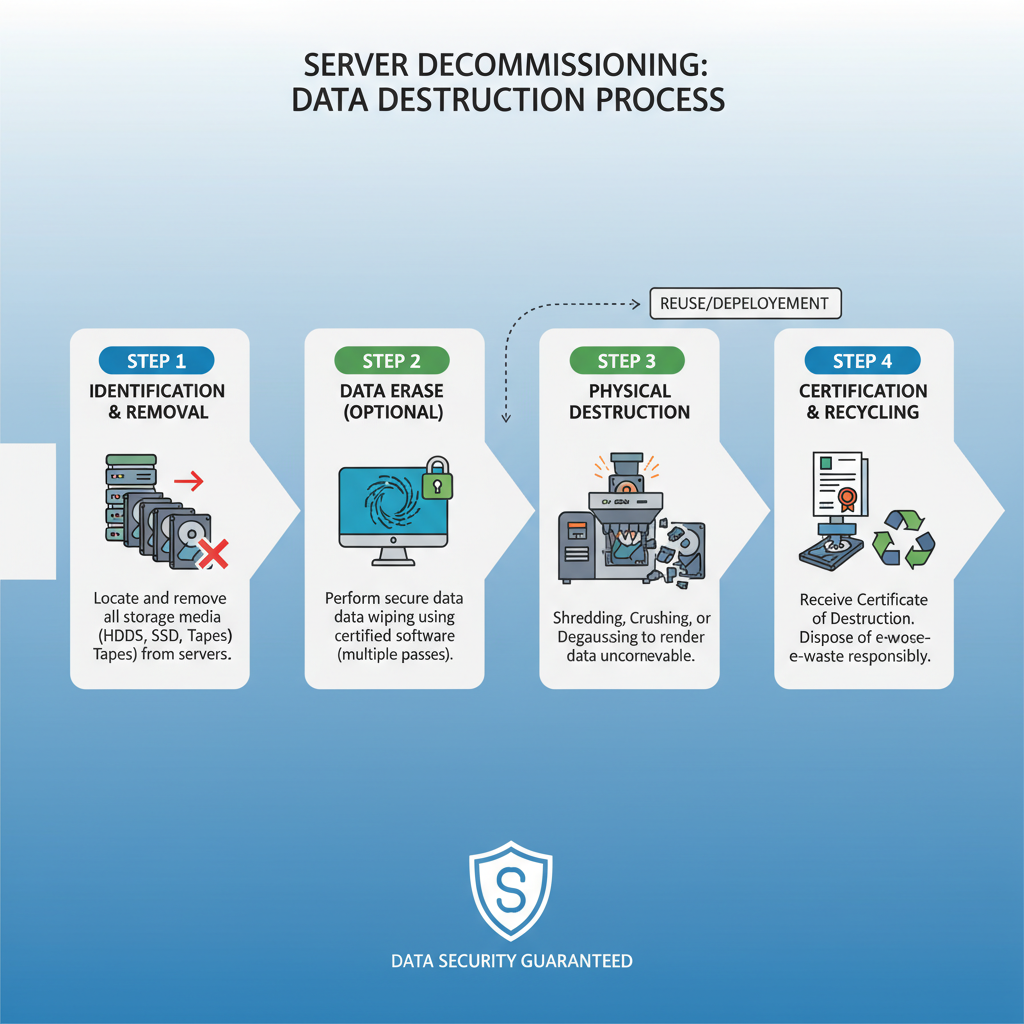
Data destruction is the most critical step in any server decommissioning process. Before any equipment leaves your data center, you must ensure that all data is either migrated to replacement systems or completely destroyed to prevent exposure. The consequences of inadequate data sanitization can be severe, ranging from regulatory penalties to reputational damage and costly data breaches.
Organizations must follow strict industry standards during the data sanitization phase. This isn't just a best practice—it's a fundamental requirement for protecting sensitive information and maintaining compliance with data protection regulations. A single overlooked hard drive can expose your organization to significant risk, which is why a systematic approach is essential.
Choosing a Certified Data Destruction Partner
Working with a certified data destruction partner is non-negotiable when decommissioning servers. Look for partners that hold NAID AAA certification, which ensures they meet rigorous industry standards for data destruction. This certification provides assurance that your data will be handled according to established protocols and that you'll receive proper documentation of the destruction process.
A certified partner will provide chain-of-custody documentation, certificates of destruction, and often video evidence of the sanitization process. These records are crucial for audit purposes and demonstrate due diligence in protecting sensitive information.
Data Sanitization Methods
There are several approved methods for data destruction, each appropriate for different scenarios:
- Physical destruction: Shredding, crushing, or degaussing drives to make data recovery impossible
- Cryptographic erasure: Destroying encryption keys to render encrypted data unreadable
- Overwriting: Using software to overwrite data multiple times according to approved standards
The method you choose depends on the sensitivity of your data, compliance requirements, and whether you plan to reuse or recycle the hardware. For highly sensitive environments, physical destruction often provides the highest level of assurance.
Documentation and Verification
Proper documentation is essential throughout the data destruction process. Maintain detailed records of which assets underwent destruction, the method used, the date of destruction, and the personnel involved. This documentation becomes critical during audits and helps demonstrate compliance with regulatory requirements.
Verification should occur at multiple stages: before destruction begins, during the process, and after completion. This multi-layered approach ensures nothing slips through the cracks and that all data-bearing devices are accounted for and properly sanitized.
Sources
Step 2: Asset Tagging
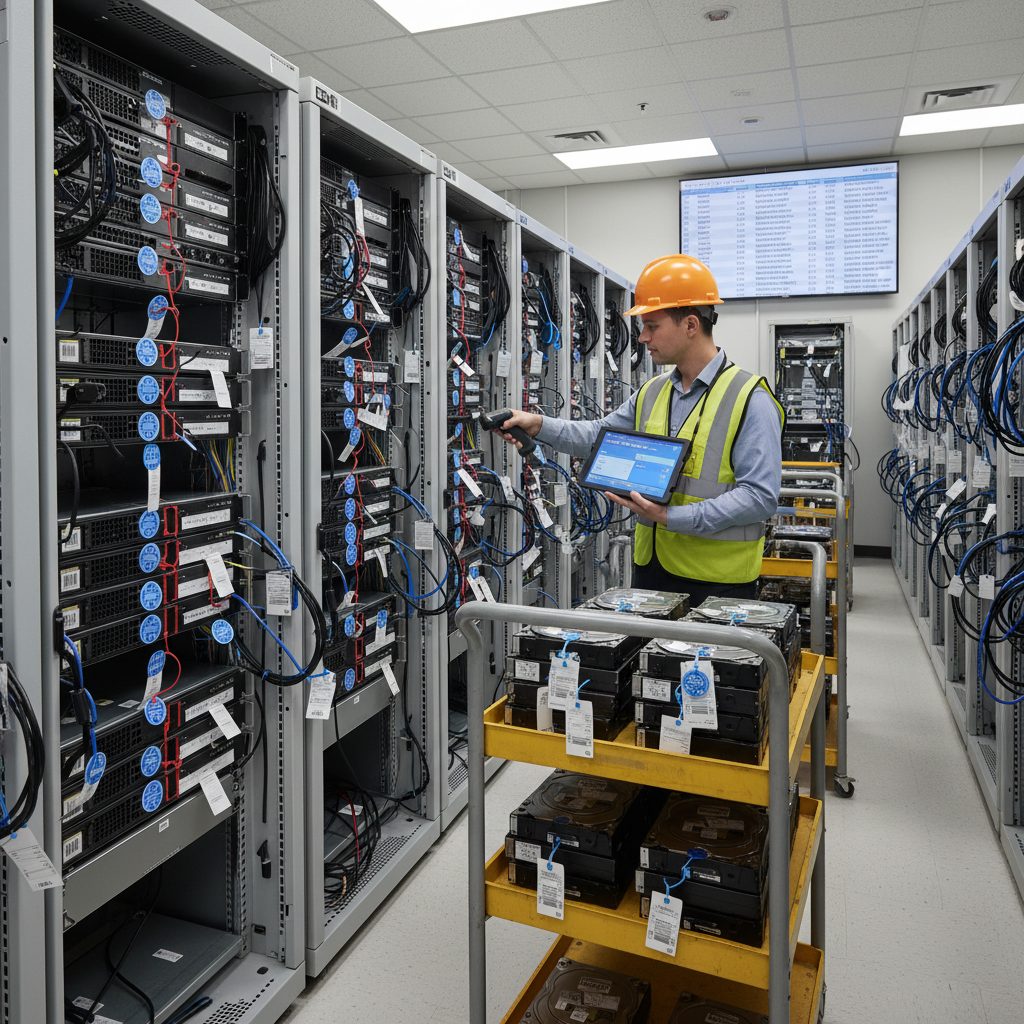
Asset tagging is a critical component of the server decommissioning process that enables accurate tracking and accountability throughout the entire lifecycle. Proper asset identification ensures that every piece of hardware is documented, monitored, and accounted for from the moment it's flagged for decommissioning until final disposal or recycling.
Why Asset Tagging Matters in Server Decommissioning
Without a robust asset tagging system, organizations risk losing track of valuable equipment, creating security vulnerabilities, or failing compliance audits. Each server should have a unique identifier—typically a barcode, RFID tag, or serial number—that connects it to your asset management database. This identifier becomes the foundation for all subsequent decommissioning activities, including data sanitization records, chain of custody documentation, and final disposition certificates.
Asset tagging also plays a vital role in financial reporting and audit trails. When servers are properly tagged and tracked, IT departments can accurately report on asset values, depreciation schedules, and disposal costs. This level of detail is essential for organizations that must comply with regulatory requirements or demonstrate responsible asset management practices.
Implementing an Effective Asset Tagging System
The asset decommissioning process begins with accurate asset identification as the first step in managing end-of-life equipment. Start by conducting a physical inventory of all servers scheduled for decommissioning. Verify that each unit's tag matches the information in your configuration management database (CMDB) or asset management system.
Key information to capture during asset tagging includes:
- Serial number and manufacturer details
- Model and configuration specifications
- Original purchase date and cost
- Current location and responsible department
- Decommissioning authorization and date
- Assigned disposal method (reuse, resale, recycling, or destruction)
Once tagged, update your asset management system to reflect the server's new status. This creates a clear audit trail and prevents the equipment from being accidentally redeployed or overlooked during the pickup process.
Maintaining Asset Records Throughout Decommissioning
Asset tags serve as the primary reference point throughout every phase of decommissioning. When data sanitization is performed, the asset tag links the server to its destruction certificate. During physical removal, the tag confirms which units are authorized for pickup. After disposal, the tag connects the equipment to recycling or destruction documentation.
This systematic approach minimizes errors and ensures nothing falls through the cracks. In my experience overseeing decommissioning projects, maintaining meticulous asset records has been the difference between a smooth process and a compliance nightmare. Every server that leaves your facility should have a complete paper trail tied to its unique asset identifier.
Sources
Step 3: Chain of Custody
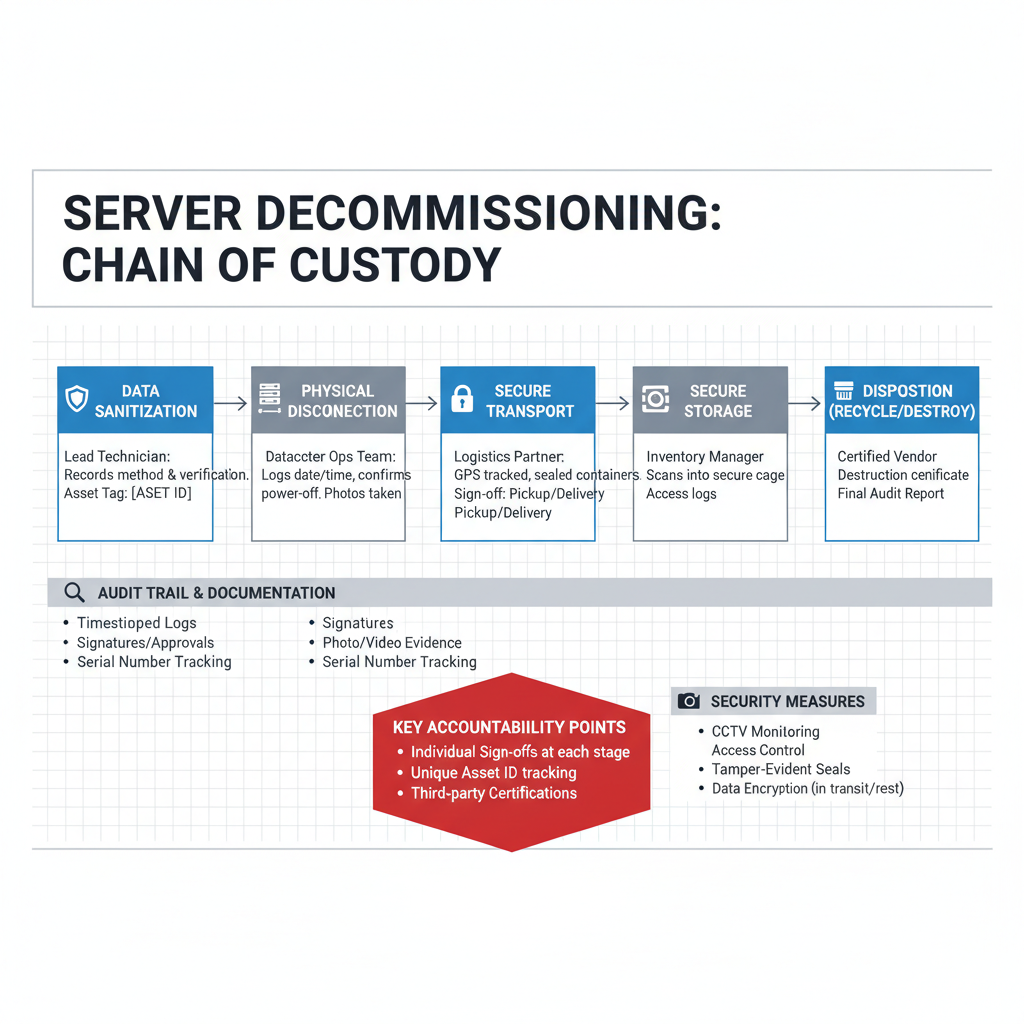
Maintaining a clear chain of custody is one of the most critical aspects of server decommissioning. This process involves documenting every movement, handoff, and status change of your decommissioned equipment from the moment it leaves active service until final disposal or repurposing. Without proper documentation, you risk security vulnerabilities, compliance failures, and potential liability issues.
Why Chain of Custody Matters
Chain of custody creates an unbroken record of who handled each asset, when they handled it, and what actions they performed. This accountability trail protects your organization in several ways. First, it ensures compliance with regulatory requirements that mandate documented handling of sensitive equipment. Second, it provides legal protection if questions arise about data security or asset disposal. Third, it helps prevent internal theft or mishandling by creating clear responsibility at each stage.
In live environments, disciplined execution becomes even more important. Every movement and handoff must be documented for accountability to avoid operational disruption. Rushing through this step can create security vulnerabilities that expose your organization to unnecessary risk.
Implementing Effective Chain of Custody Procedures
Start by creating a standardized form that captures essential information at each handoff point. This form should include the asset tag number, serial number, date and time of transfer, names and signatures of both the transferring and receiving parties, and the current status of the asset. Digital tracking systems can streamline this process, but paper backups provide redundancy in case of system failures.
Designate specific individuals as authorized handlers at each stage of the decommissioning process. Only these authorized personnel should be able to sign off on transfers. This limits the number of people in the chain and makes tracking simpler and more reliable.
Documentation Best Practices
Photographic evidence adds another layer of protection to your chain of custody. Take photos of equipment before removal, during staging, and at the point of handoff to disposal vendors. These images serve as visual proof of equipment condition and help resolve disputes about damage or missing components.
Maintain a centralized repository for all chain of custody documentation. Whether you use a dedicated database, a secure cloud storage system, or a physical filing system, ensure that records are easily retrievable and protected from unauthorized access. Retention policies should align with your industry's compliance requirements—many regulations require maintaining these records for several years.
When the disposal vendor arrives for pickup, require them to sign a detailed receipt that lists every asset by tag number and serial number. This receipt becomes part of your permanent chain of custody record and provides proof that equipment left your facility in authorized hands. Verify that the vendor's documentation matches your internal records before allowing any equipment to leave the premises.
Sources
Step 4: Network Cleanup
Network cleanup is one of the most overlooked yet critical steps in server decommissioning. When servers are removed from your infrastructure without proper network configuration cleanup, you risk leaving behind digital footprints that can create security vulnerabilities and operational confusion. These "network ghosts" can persist far longer than you might expect, potentially exposing your organization to unnecessary risks.
Removing DNS and DHCP Entries
Start by identifying all DNS records associated with the decommissioned server. This includes A records, CNAME records, and any reverse DNS entries. Leaving these in place can cause service disruptions when other systems attempt to connect to non-existent resources. Similarly, remove DHCP reservations to prevent IP address conflicts and ensure your address space remains clean and available for future use.
Clearing Firewall Rules and Access Controls
Firewall rules and access control lists often accumulate over time, and decommissioned servers typically have multiple entries across various network segments. Review your firewall configurations and remove any rules that reference the server's IP addresses or hostnames. This cleanup prevents unauthorized access attempts and reduces the attack surface of your network infrastructure.
Updating Network Documentation
Maintaining accurate network documentation is essential for long-term operational efficiency. Update network diagrams, IP address management systems, and configuration management databases to reflect the removal of the decommissioned server. This documentation ensures that future administrators don't waste time troubleshooting connections to systems that no longer exist.
Decommissioning Virtual Network Interfaces
For virtualized environments, remove virtual network interfaces, port groups, and VLAN assignments associated with the decommissioned server. This cleanup helps maintain a lean virtual infrastructure and prevents resource allocation issues. Don't forget to check for any network monitoring or management agents that may still be configured to monitor the retired system.
Verifying Load Balancer and Proxy Configurations
If the decommissioned server was part of a load-balanced pool or behind a reverse proxy, ensure it's removed from all relevant configurations. Leaving these entries in place can cause service degradation as load balancers continue attempting to route traffic to unavailable endpoints, resulting in timeout errors and poor user experience.
Proper network cleanup is a fundamental component of server decommissioning that protects your organization from lingering security risks and operational inefficiencies. By systematically removing all network-level references to retired servers, you maintain a clean, secure, and well-documented infrastructure.
Sources
Step 5: License Reclamation
License reclamation is one of the most overlooked opportunities in server decommissioning. When servers are retired, the software licenses tied to those systems often remain active and billable, quietly draining IT budgets. Reclaiming these licenses during the decommissioning process can unlock significant cost savings and improve overall asset management.
Why License Reclamation Matters
Many organizations pay for software licenses on a per-server or per-core basis. When a server is decommissioned without proper license tracking, those licenses continue to generate recurring costs despite no longer being in use. By systematically identifying and reclaiming unused licenses, IT teams can reallocate them to new systems, reduce renewal costs, or negotiate better terms with vendors.
Effective asset decommissioning helps organizations recover value from retired IT equipment through resale, reuse, and recycling, which can significantly reduce the total cost of ownership. This same principle applies to software assets: reclaiming licenses is a form of value recovery that directly impacts your bottom line.
Steps for Effective License Reclamation
Start by creating an inventory of all software installed on the decommissioned server. Cross-reference this list with your license management database to identify which licenses are transferable, which are perpetual, and which are subscription-based. Contact software vendors as needed to formally deactivate or transfer licenses according to their policies.
Document every reclaimed license in your asset management system, noting the license key, product version, and new assignment or availability status. This documentation ensures that reclaimed licenses don't get lost in the shuffle and can be quickly deployed when needed.
Financial Impact
The financial benefits of license reclamation can be substantial. Some organizations discover that a significant percentage of their software spend is tied to decommissioned or underutilized assets. By implementing a disciplined reclamation process, you can avoid unnecessary renewals and redirect those funds toward more strategic initiatives.
While revenue recovery from hardware recycling can vary by provider and processing standards, the immediate cost avoidance from license reclamation is often more predictable and easier to quantify. Make license reclamation a standard checkpoint in your decommissioning workflow to ensure no value is left on the table.
Sources
Step 6: Post-Pickup Verification
Once the truck has left with your decommissioned servers, the work isn't over. Post-pickup verification is the final checkpoint that ensures every preceding step was executed correctly and nothing slipped through the cracks. This phase provides the peace of mind that comes from confirming all assets were properly accounted for, all data destruction protocols were followed, and all documentation is complete.
Without this verification step, you're left vulnerable to compliance gaps, unaccounted assets, and potential security risks that could surface weeks or months later. A thorough post-pickup review closes the loop on your decommissioning process.
Review Documentation and Certificates
Start by collecting and reviewing all certificates of destruction, chain-of-custody forms, and asset disposal receipts from your vendor. These documents serve as proof that data was destroyed according to regulatory standards and that physical assets were handled properly. Cross-reference each certificate against your original asset inventory to ensure every server, hard drive, and component is accounted for.
If any discrepancies appear—missing certificates, unmatched serial numbers, or incomplete documentation—address them immediately with your vendor. This is your last opportunity to rectify errors before they become compliance liabilities.
Verify Network and System Cleanup
Confirm that all network configurations related to the decommissioned servers have been removed. Check DNS records, DHCP reservations, firewall rules, and monitoring systems to ensure no ghost entries remain that could cause confusion or security vulnerabilities down the line. Creating detailed shutdown runbooks that document dependencies, shutdown order, and verification tests can help avoid service disruptions and ensure nothing is overlooked during this critical phase.
Run through your internal systems to verify that decommissioned servers no longer appear in asset management databases, backup schedules, or patch management tools. Clean records prevent future administrative headaches and reduce clutter in your IT infrastructure.
Conduct a Final Compliance Check
Review your entire decommissioning process against applicable compliance frameworks—whether that's NIST 800-88, GDPR, HIPAA, or industry-specific regulations. Verify that every required step was documented and that all certifications meet the standards set by your compliance team or auditors. Organizations handling decommissioning without proper certifications put their data at risk, which underscores the importance of this final compliance validation.
Schedule a brief post-mortem meeting with your team to discuss what went well and what could be improved for future decommissioning projects. Document lessons learned and update your internal procedures accordingly.
Confirm Financial and License Reconciliation
Double-check that all reclaimed licenses have been properly reassigned or returned to your license pool. Verify that any expected credits or refunds from vendors have been processed. Ensure that the decommissioned assets have been removed from depreciation schedules and financial tracking systems.
This financial reconciliation ensures you're not paying for resources you no longer use and that your asset ledgers accurately reflect your current infrastructure.
Sources
Conclusion
A comprehensive server decommissioning process is essential for protecting your organization from data breaches, compliance violations, and unnecessary costs. By following the six core steps outlined in this checklist—data destruction, asset tagging, chain of custody, network cleanup, license reclamation, and post-pickup verification—you create a structured framework that ensures nothing falls through the cracks.
Each step builds on the previous one, creating multiple layers of protection and accountability. Data destruction eliminates security risks at the source, while asset tagging and chain of custody provide the documentation trail needed for compliance audits. Network cleanup prevents lingering vulnerabilities, and license reclamation recovers valuable software assets that might otherwise continue generating costs. Finally, post-pickup verification confirms that every step was executed correctly, providing the peace of mind that comes from knowing your decommissioning project was completed successfully.
The consequences of skipping or rushing through any of these steps can be severe. A single overlooked hard drive can expose sensitive data. An undocumented handoff can create liability gaps. Unclaimed licenses can drain budgets for months or years. The time invested in following a thorough decommissioning checklist pays dividends in risk mitigation and cost recovery.
Going through every item on a server decommissioning checklist, from asset tagging to chain-of-custody handoff, was essential to making sure nothing fell through the cracks in my own experience. The process taught me that meticulous planning and execution aren't optional—they're the foundation of responsible IT asset management. Whether you're decommissioning a single server or an entire data center, the principles remain the same: document everything, verify each step, and never assume a task is complete until you've confirmed it yourself.